How to Create a Custom Domain Email Without Running a Mail Server

Running your own mail server on a VPS is notoriously error-prone and maintenance-heavy. Even with a correctly configured Postfix or Mail-in-a-Box setup, you must continuously manage SPF, DKIM, DMARC, reverse DNS (PTR), IP reputation, spam filters, and blacklists.
If your goal is to use a professional custom domain email like info@example.com with high deliverability and zero server maintenance, there is a simple, cost-effective architecture:
- Cloudflare Email Routing: Handles incoming email forwarding to your existing inbox.
- Gmail: Serves as your unified web and mobile email client.
- SMTP2GO: Delivers authenticated outgoing emails via SMTP using your domain.
Architecture Overview
graph TD
    subgraph Incoming Flow
        Sender["External Sender"] -->|MX Record| CF["Cloudflare Email Routing"]
        CF -->|Forward| GmailInbox["Gmail Inbox"]
    end

    subgraph Outgoing Flow
        GmailApp["Gmail Interface"] -->|SMTP Port 587| SMTP2GO["SMTP2GO Server"]
        SMTP2GO -->|SPF / DKIM / DMARC| Recipient["Target Recipient"]
    end
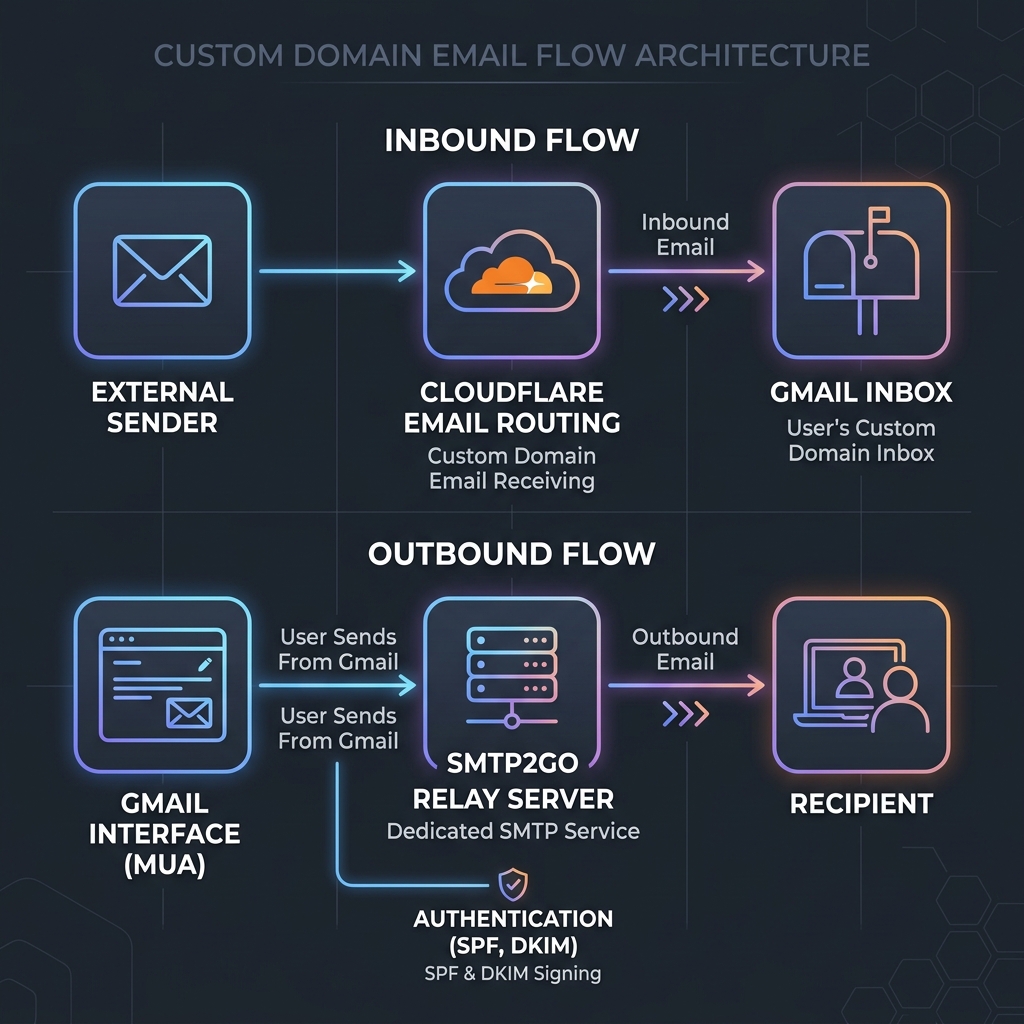
With this architecture, incoming messages sent to your custom domain arrive seamlessly in your regular Gmail inbox, and outgoing emails sent from Gmail appear to the recipient as coming directly from your custom domain.
Prerequisites
Before starting, ensure you have:
- A registered domain name.
- A free Cloudflare account with your domain's DNS managed by Cloudflare.
- A standard Gmail account.
- A free account on SMTP2GO.
Step 1: Enable Cloudflare Email Routing
- Navigate to Cloudflare Dashboard → Select Domain → Email → Email Routing.
- Click Enable Email Routing. Cloudflare will prompt you to automatically add the required MX and SPF records to your DNS settings.
- Create a custom email route:
- Custom Address:
info@example.com(or your preferred alias) - Destination Address:
yourname@gmail.com
- Custom Address:
- Check your Gmail inbox for Cloudflare's verification link and click to authorize forwarding.
Once verified, any email sent to info@example.com will be forwarded directly to your Gmail inbox.
Step 2: Configure Outbound Delivery with SMTP2GO
- Sign up for a free SMTP2GO account (up to 1,000 free emails per month).
- Go to Settings → Sender Domains in SMTP2GO and add your custom domain.
- SMTP2GO will generate CNAME records for domain authentication (DKIM and Return-Path).
- Add these CNAME records into your Cloudflare DNS control panel:
| Type | Name / Host | Target / Value |
|---|---|---|
CNAME |
s12345._domainkey |
dkim.smtp2go.net |
CNAME |
em12345 |
return.smtp2go.net |
- Click Verify in SMTP2GO once the records propagate.
Step 3: Generate SMTP Credentials
- In the SMTP2GO Dashboard, navigate to Settings → SMTP Users.
- Click Add SMTP User.
- Create a username and strong password (e.g.
smtp-info-example). Save these credentials securely.
Step 4: Configure "Send Mail As" in Gmail
- Open Gmail in a desktop browser and go to Settings → See all settings → Accounts and Import.
- Under Send mail as, click Add another email address.
- In the popup dialog:
- Name: Your Name / Company Name
- Email Address:
info@example.com - Uncheck Treat as an alias if you want replies sent directly to your custom domain.
- Click Next Step and enter the SMTP server details:
SMTP Server: mail.smtp2go.com
Port: 587
Secured connection using TLS
Username: <your_smtp2go_username>
Password: <your_smtp2go_password>
- Click Add Account. Gmail will send a verification code to
info@example.com. - Open your Gmail inbox (where Cloudflare forwarded the code), enter the code, and click Verify.
Step 5: Testing End-to-End Delivery
Testing Inbound
Send a test message from a third-party email account to info@example.com. It should arrive in your Gmail inbox within seconds.
Testing Outbound
In Gmail, click Compose, select From: info@example.com, and send a test message to an external recipient. Verify that:
- The email is delivered without entering the Spam folder.
- The
Fromheader displaysYour Name <info@example.com>. - Clicking Reply sends responses back to
info@example.com.
Deliverability Comparison: Managed Outbound vs. Self-Hosted Mail Server
| Feature | Self-Hosted Postfix / VPS | Cloudflare + Gmail + SMTP2GO |
|---|---|---|
| Monthly Cost | $5 - $20/month (VPS) | Free (within standard limits) |
| Maintenance | High (OS updates, log rotation, security patches) | Zero maintenance |
| IP Reputation | Susceptible to shared VPS range blacklisting | Managed dedicated pool with high IP reputation |
| Spam Filtering | Manual SpamAssassin tuning required | Google AI spam filtering included |
| Mobile Client | Native IMAP/POP3 configuration | Native Gmail iOS / Android app |
Trade-offs and Limitations
While this architecture is ideal for developers, personal portfolios, and small businesses, consider the following limitations:
- Free Tier Volume: SMTP2GO offers 1,000 free emails per month. High-volume transactional or bulk marketing campaigns require a paid SMTP plan or dedicated provider like AWS SES / Resend.
- Single Inbox Workflows: Designed for individual users or small teams. Large organizations requiring shared mailboxes or Microsoft Exchange / Google Workspace sync should use full suite providers.
Conclusion
Combining Cloudflare Email Routing, Gmail, and SMTP2GO provides a robust, zero-maintenance, serverless custom domain email solution. You maintain full domain ownership, enjoy Gmail's interface and spam protection, and ensure high outbound deliverability without running a mail server on a VPS.